In today’s fast-paced world, finding moments of tranquility and mindfulness can be challenging. Many people are turning to creative activities as a way to unwind and reconnect with themselves. One such activity that has gained popularity is coloring books. These seemingly simple books offer more than just a nostalgic return to childhood; they have become a powerful tool for meditation and stress relief.
The Therapeutic Power of Coloring
Coloring books for adults are designed with intricate patterns and detailed images that require focus and concentration. Engaging in this activity can have a meditative effect, similar to that of traditional meditation practices. Here’s how coloring books can enhance your well-being:
1. Stress Reduction: Focusing on coloring can help divert your mind from daily stresses. It provides a break from negative thoughts and anxiety, allowing you to immerse yourself in a creative and calming task.
2. Mindfulness: The repetitive action of coloring promotes mindfulness. It encourages you to stay present in the moment, paying attention to the colors, shapes, and patterns you are creating.
3. Enhanced Concentration: As you choose colors and stay within the lines, you develop a stronger focus. This can improve your ability to concentrate on tasks outside of coloring as well.
4. Creativity Boost: Coloring stimulates the creative areas of your brain, fostering a sense of accomplishment and boosting self-esteem.
Try It for Free: Download 12 Sample Pages
Integrating Coloring into Your Meditation Practice
To maximize the benefits of coloring, you can integrate it into your meditation routine. Here are a few tips to get started:
– Set the Mood: Create a peaceful environment with soft lighting and calming music. This sets the tone for a relaxing coloring session.
– Choose Your Tools: Select high-quality coloring materials that feel good to use. The tactile experience can enhance the meditative quality of the activity.
– Focus on Your Breathing: As you color, pay attention to your breathing. Deep, steady breaths can help you stay calm and focused.
– Stay Present: Try to keep your thoughts on the task at hand. If your mind wanders, gently bring it back to the colors and patterns.
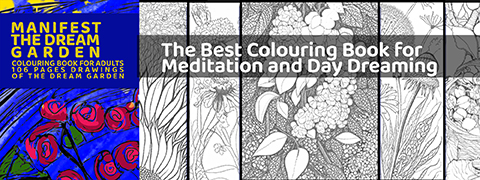
Introducing “Manifest the Dream Garden”
One coloring book that stands out in promoting meditation and mindfulness is “Manifest the Dream Garden”. This beautifully designed book combines intricate illustrations with inspirational quotes, creating a perfect blend of creativity and contemplation.
“Manifest the Dream Garden” invites you to explore a magical world of floral patterns, whimsical creatures, and serene landscapes. Each page is a journey into a peaceful sanctuary where you can manifest your dreams and aspirations through the meditative process of coloring.
Why “Manifest the Dream Garden” is Unique:
– Inspirational Quotes: Each illustration is paired with a motivational quote that encourages positive thinking and self-reflection.
– Themed Illustrations: The book features a variety of themes that cater to different moods and preferences, ensuring that there is something for everyone.
– Quality Design: Printed on high-quality paper, the pages are designed to withstand different coloring tools, from pencils to markers, without bleeding through.
By incorporating “Manifest the Dream Garden” into your meditation practice, you can unlock a new dimension of mindfulness and creativity. This book not only helps you relax and unwind but also serves as a tool for personal growth and self-expression.
Try It for Free: Download 12 Sample Pages
To give you a taste of what “Manifest the Dream Garden” has to offer, we are excited to provide a free download of six sample pages. These pages will give you a glimpse into the intricate designs and inspirational quotes that make this book special. Whether you’re new to coloring or a seasoned enthusiast, these samples are a great way to experience the therapeutic benefits firsthand.
Download Your Free Sample Pages
Conclusion Coloring books are more than just a pastime; they are a gateway to mindfulness and inner peace. By dedicating time to this meditative practice, you can reduce stress, enhance concentration, and boost your creativity. “Manifest the Dream Garden” is a wonderful resource to aid in this journey, offering beautifully designed pages that inspire and calm the mind. Embrace the therapeutic power of coloring, download your free sample pages, and discover the tranquility that lies within.